Meats and Sausages

Teardown Examinations
In a commercial plant can must be tear-down and double seam examined at intervals not to exceed 4 hours. The examination should be also performed after a shut down. A home owner is not bound by those regulations and he is not expected to tear up the can every time he uses a can sealer. However, when he changes the chuck to accommodate a different diameter can, he must readjust the gap between both rollers and the chuck. This is a good time to tear up one can in order to be absolutely sure that the seam is tight. Comparing the closure made with a home sealer to the bottom seam made in a factory is not recommended as the two will differ. The commercial seaming heads work differently and often employ more than one set of the 1st and the 2nd rollers. In commercial operations a specially designed power-driven seam saw cuts cans fast and clean so they can be examined. A home owner will use commonly available tools such as hack saw, file or handheld rotary tools.
Teardown Procedure
- Remove the center panel of the cover.
- Tear off the strip of the cover left by the can opener.
- Cut the can body to expose the cross section of the seam.
- Examine/measure the seam.
Tools
In order to measure the seam accurately the can must be tear down.
NOTE measurements like countersink depth, seam width and thickness must be taken before the can is cut.
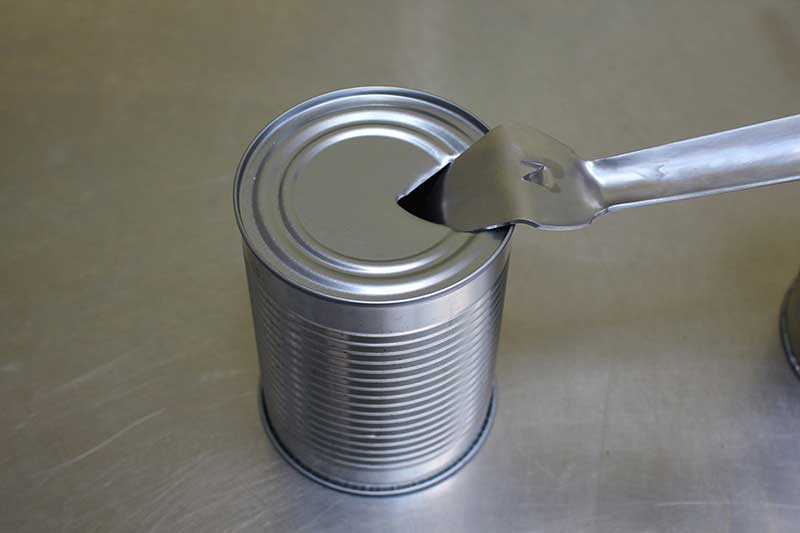
Can Opener. A conventional household can opener should not be used as it will distort the seam and the measurements will be off. A special can seam opener will cut the center part of the lid without damaging the seam.
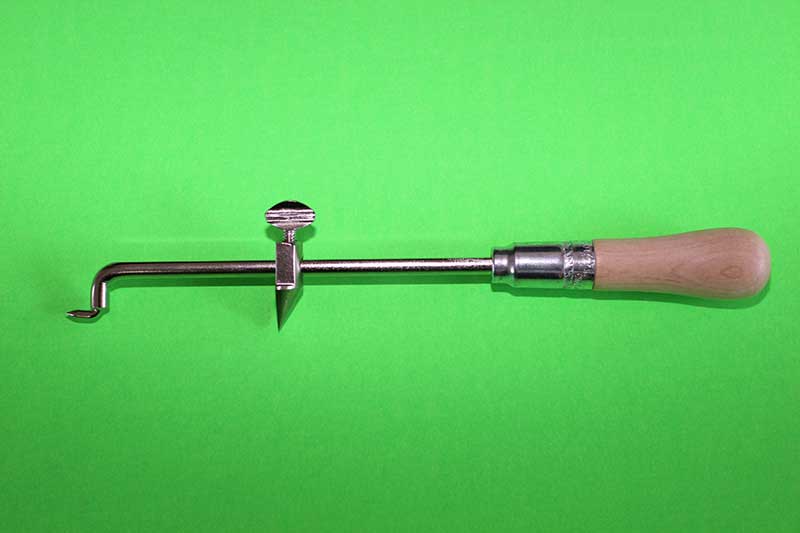
Can seam opener.
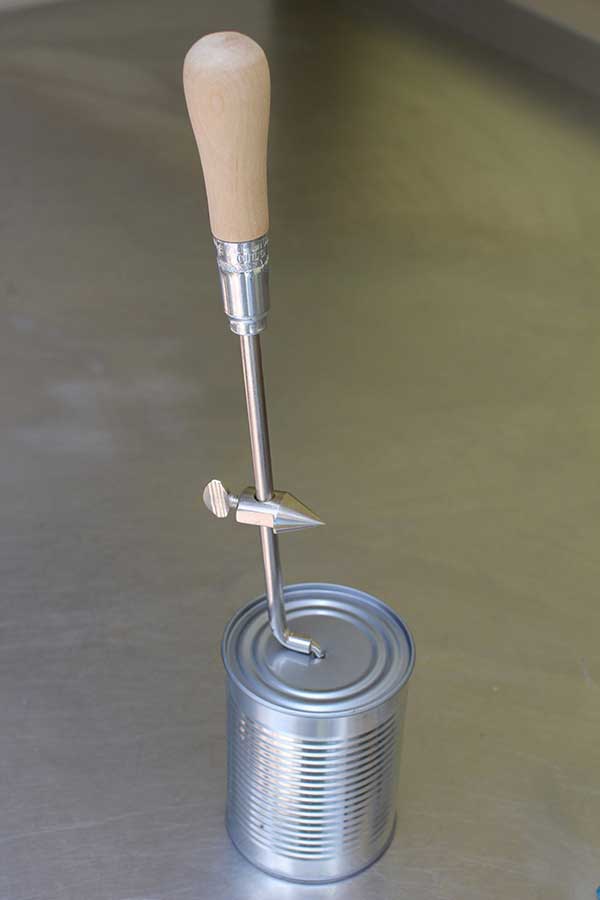
Insert can opener.

Adjust diameter.

Cut.
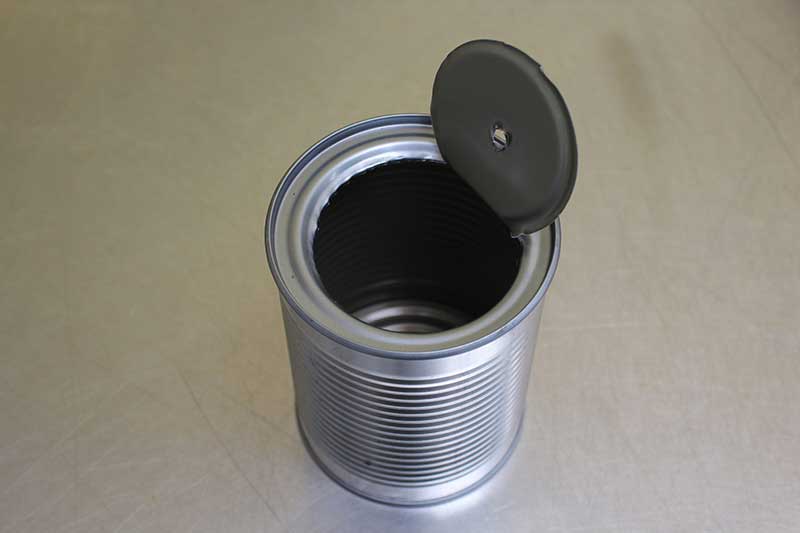
Lift the cover.
The center part of the lid can be cut out with other tools as long as the seam is not damaged. Punch a hole in the lid and then cut the lid out using aviation snips.

Oversize bottle cap opener.
Can seam opener.

Aviation snips.

Center part of the lid is removed.
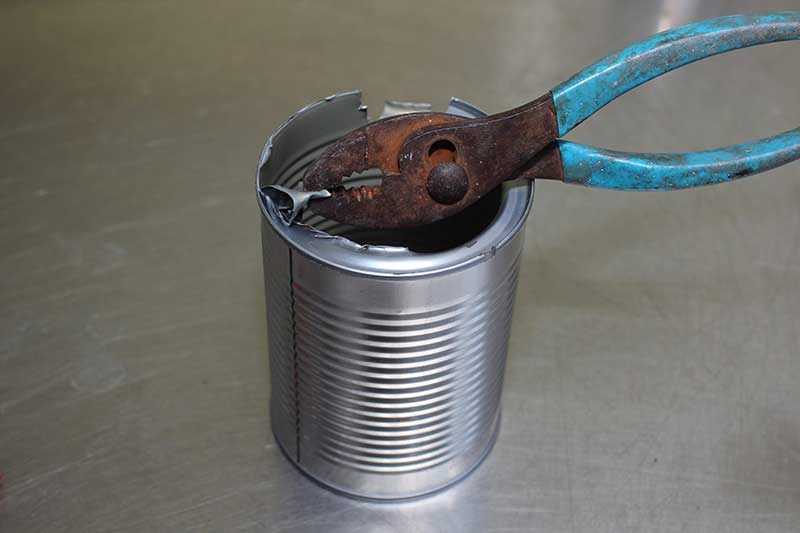
Stripping the cover.
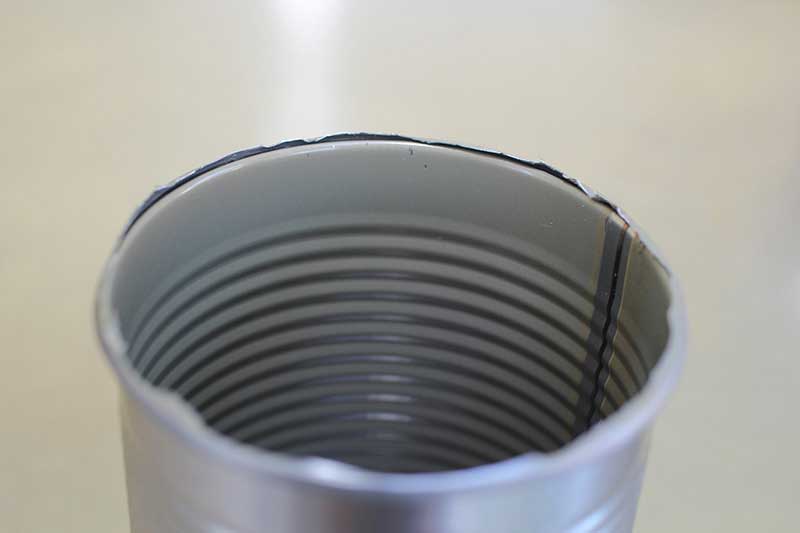
Stripped can. The lid has been removed without inflicting damage to the seam. The protruding little lip on the circumference of the can is the beginning of the cover hook.
Exposing the Seam
Visual inspection of the seam is a simple procedure. Cut the center part of the lid out as described earlier. You don't need to strip away the remaining part of the lid. A home owner can use of of the following methods:
- Hacksaw
- File
- Rotary tool with a cut off disc
- Hacksaw
- Even if a fine blade is chosen (32 teeth per inch), cutting through the seam using a hacksaw is difficult unless the can is strongly supported. This will require a large vise or pipe holding equipment.
- File
- The filing method presents a little problem as the cut is not perfectly clean. The metal shavings fill the gaps in the seam and obstruct the view. You will need to obtain a lath file which has one surface smooth and will not interfere with the seam. Filing is easier as one hand can hold the can and another cuts with the file.
Filed grooves.
Cut through the seam, about 1-1/2 inch away left from the vertical side weld. Then make another cut about 1 inch away from the first one.
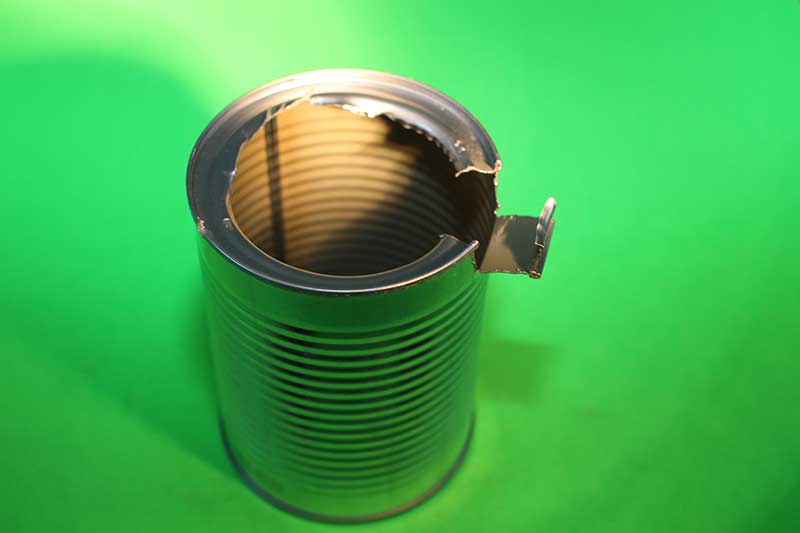
Seam section ready for visual inspection.
Push from inside on the cut section and it will bend away from the can. The seam can be examined with a 10X jewelers loupe.
Examine the cross section of the seam with a Rotary tool. A cutting disc leaves a clean cut. There is a variety of rotary tools and grinders that will do the job. The simplest solution is presented below: a common drill with an abrasive cut-off disc.
WARNING This is a power tool so pay attention to your safety. Goggles, gloves and securing the can are a must.
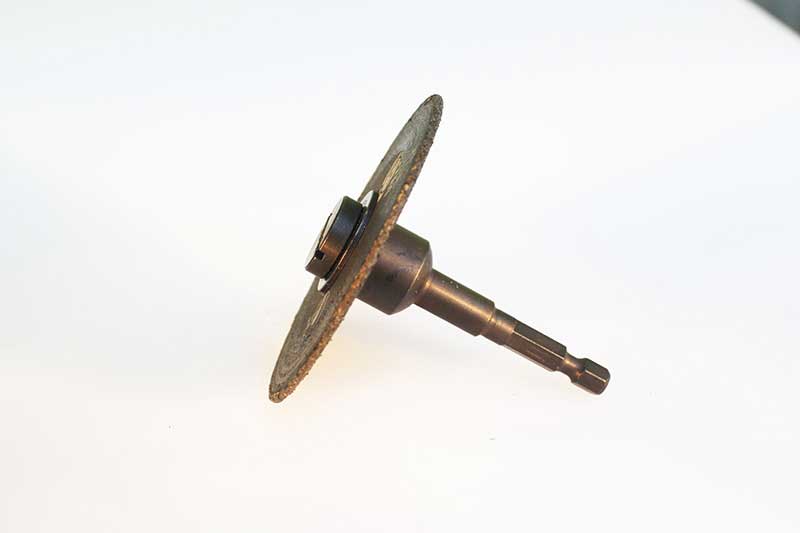
Abrasive cut off disc.
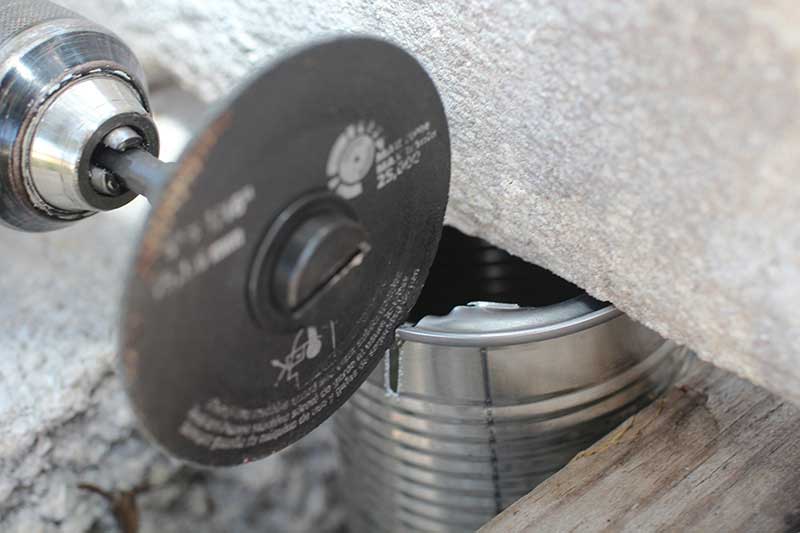
Using common drill equipped with a cut-off disc.
The homeowner will probably not go much further beyond the visual inspection. To measure the body and cover hooks and to determine the tightness of the seam, the more detailed tear-down procedure is required. The body and cover hooks are compressed together but they need to be separated in order to take measurements. The complete stripping of the cover disengages the hook which is still attached to the body hook (see A).
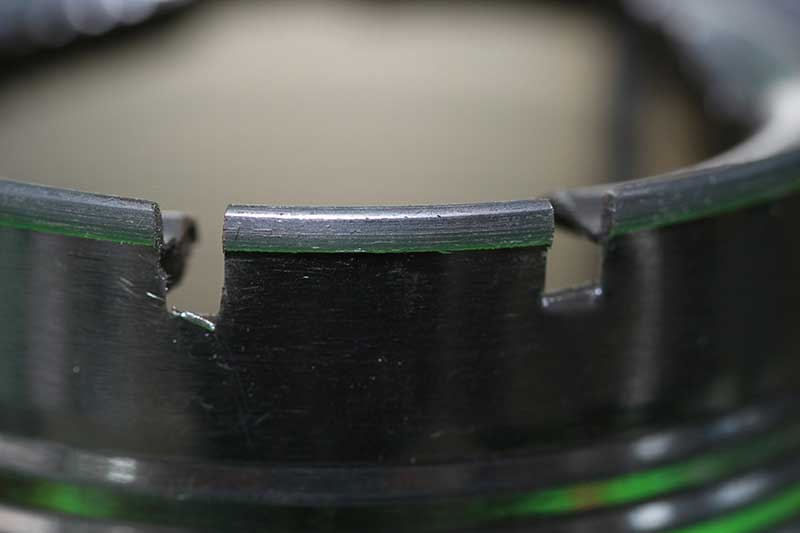
Make two file cuts through the seam into the body of the can, about an inch apart. File through the first thickness of seam. This removes the top part of the cover hook (see B). Tap the edge of the file on the side of the filed section to knock it down and remove it. This is the hardest part, but take time in order not to damage the seam.
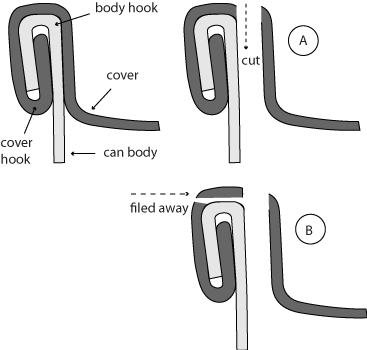
Disengaging hooks.
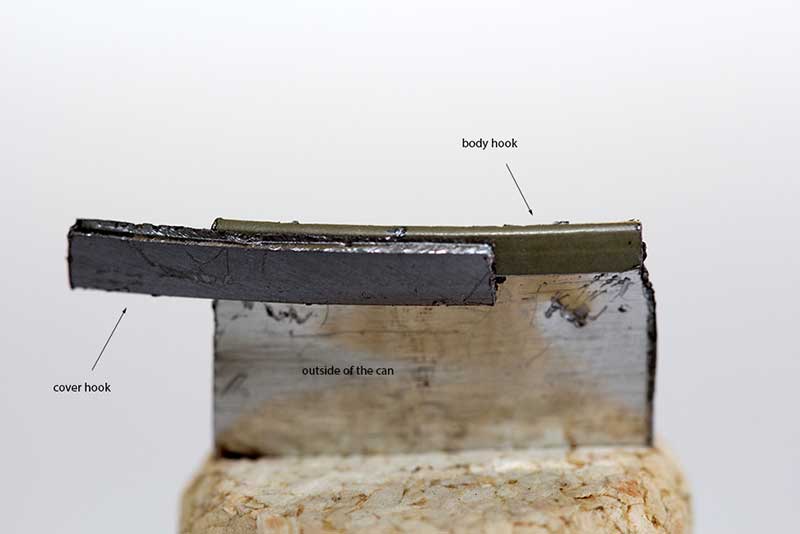
View at the Fig. 3.16 - circle B looking at the seam from the outside.
View at the Fig. 3.16 - circle B looking at the seam from the inside of the can.
A part of the cover hook.
A part of the cover hook still attached to the can.
What follows are the most common defects that may be observed with a naked eye during tear up inspections.
Short cover hook.

Long cover hook.

Short body hook.
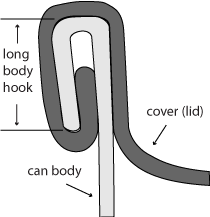
Long body hook.
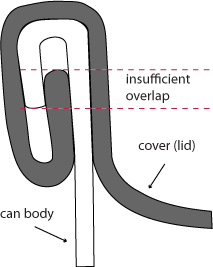
Insufficient overlap.
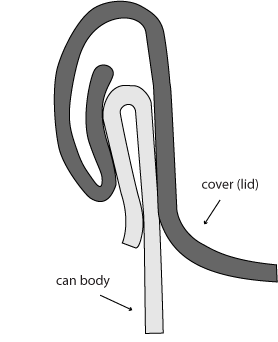
False seam.
Some defects are more important than others, for example a false seam or insufficient overlap may be considered critical defects. There are many more defects like sharp seams, bumped seam, droop, vee or knocked down flange.
NOTE if the seam looks in any way different than usual, throw the can away. In 3-piece cans you may compare your seam with the factory made bottom seam, however, keep in mind that it was made on a different machine. Can sealers should be checked before using to see that they are adjusted to make a good seal. One method of testing, popular among homeowners, is to partly fill a can with water. Seal the cover, then drop the can into hot water deep enough to cover the can. Use a jar lifter or another can to hold the tested can submerged. If air bubbles come up around the lid of the can, the seam is not tight and the sealer needs adjusting.
CAUTION according to experts this method will not discover microscopic size holes. It is clear that this method will not be accepted by the FDA/USDA inspectors.
NOTE much more information about seams and their defects can be found at the excellent site The Double Seam www.doubleseam.com
Useful Tools
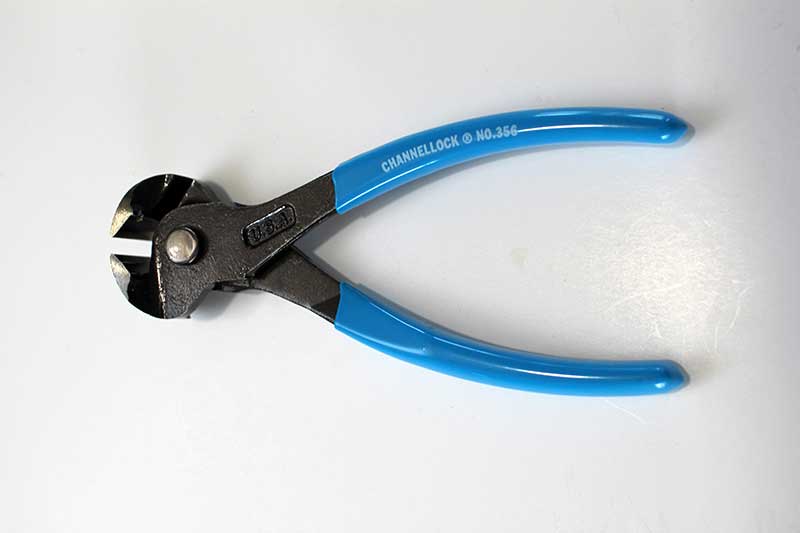
Nippers are used to tear off the can seams. # 5 is a good choice.
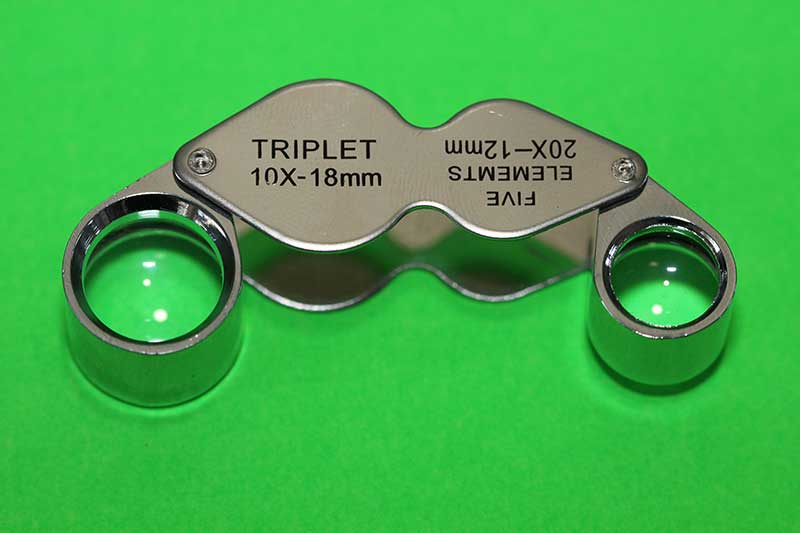
Jewelers loupe. 10X magnification is all that is needed. A home owner is not going to invest thousands of dollars into a computerized seam projector. However, for a few dollars he can buy a loupe which will enlarge the details of the seam.
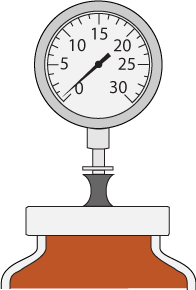
Canning vacuum gauge is used to check the vacuum created after a jar or can is sealed. Gauge needle is pushed through the cap, the rubber collar forms a temporary seal to allow for measurement. Measures vacuum from 0-30 inches of mercury (in Hg).